 In this series of posts, we will cover building a Lync 2013 lab environment, that demonstrates how you can achieve high availability with the use of an enterprise pool and also achieve reasonable system capacity. This lab will be based on publicly available evaluation software, which you can download and use to prove the value of the software within your organization, or with perspective clients.
Small disclaimer: I aim to provide you with all the information you need to get this up and running, but would always recommend you obtain professional services for production deployments if your do not have the relevant experience/training.
Contents
Defining the Lab
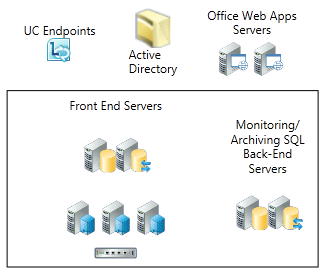
Our environment needs a number of servers and roles, we will cover each of these as we go through the lab build. In order to roll out our lab smoothly, we need to plan out our initial environment before we start. If your building a test lab, and want an enterprise pool with high availability then your fine to follow the below, however for other situations you should use the Lync 2013 Planning Tool.
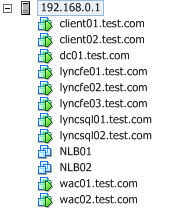
Lab IP Addressing and Host Names
Test Network: 192.168.0.0/24 (192.168.0.1-192.168.0.254 usable addresses)
192.168.0.100	DC01
192.168.0.101	LYNCFE01
192.168.0.102	LYNCFE02
192.168.0.103	LYNCFE03
192.168.0.104	LYNCSQL01
192.168.0.105	LYNCSQL02
192.168.0.106	WAC01
192.168.0.107	WAC02
192.168.0.108	NLB01
192.168.0.109	NLB02
192.168.0.110	WAC VIP (wac.test.com) (Also the initial NLB Floating IP)
192.168.0.111	LYNC VIP (lync.test.com)
192.168.0.112
--
192.168.0.150	DHCP Range Start
192.168.0.200	DHCP Range End
--
192.168.0.254	Default Gateway

Our Active Directory domain name will be: test.com
Our DNS server will be the Domain Controller DC01 (192.168.0.100)
Obtaining the required software
There are a number of applications required during the build of the lab, you may want to start downloading them now as depending on your connection, it may take some time. You should try and select products for your lab that match your production environment. These are all available as time limited evaluations, great for a lab environment and I have run the licensed/supported editions of all of these in production environments.
VMware vSphere 5.5 Evaluation
Microsoft Windows 2012 R2 Evaluation
Microsoft Windows 8.1 Evaluation
Microsoft SQL 2012 Evaluation
Microsoft Lync 2013 Server Evaluation
Loadbalancer.org Ent. VA v7.5.2 Evaluation
Microsoft Office Web Apps Server (WAC)
Update for Microsoft Office Web Apps Server 2013 (KB2837634)
Setting up the platform
In this lab I have a physical dual processor server with 32GB memory, running VMware vSphere ESX. This post will not cover the detail of installing or configuring this platform.
All servers in my lab are linked to a single virtual switch, that’s presented through the servers Ethernet adapter to a test switch. You can keep the whole lab virtual, or break out into a hybrid like this depending on your requirements. I want the option to add a wireless access point to this lab later down the line.
Building the server environment
You will now need to complete the basic installation of Windows Server 2012 R2 on all the servers. You should install 2012 R2 Standard, with the GUI. Server Core is not currently supported by Lync Server.
Being a lab, I gave each server 1CPU, 4GB memory and a 40GB thin provisioned disk (60GB for SQL servers) at this stage. These can all be adjusted as we move forward with the build, but this will allow you to get the OS installed. In order to speed up and simplify later posts, we will build most of the servers we require now.
Install 2012 R2 on: DC01, LYNCFE01, LYNCFE02, LYNCFE03, LYNCSQL01, LYNCSQL02, WAC01, WAC02
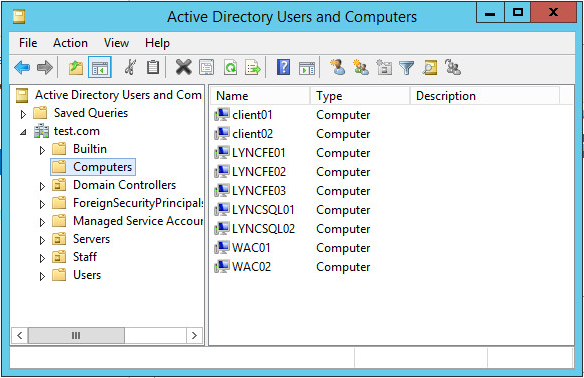
I will not cover the process in the post for provisioning Active Directory, or making it highly available as this is a topic in its own right. However you should now promote your DC01 server to be a domain controller (which also includes DNS), then deploy PKI and DHCP.
You will now need to join all your servers to the domain, and also deploy any guest tools you require. Eg: VMware Tools, AV etc.
Building the clients
In order to test the deployment, build two Windows 8.1 virtual clients. In my example, I will also be using my test PC as a 3rd client.
Building the Load Balancing
Documentation is available from loadbalancer.org to help with your deployment of the Virtual Appliance. In my test lab, I am deploying a high availability pair to match a real world requirement for maximum HA.
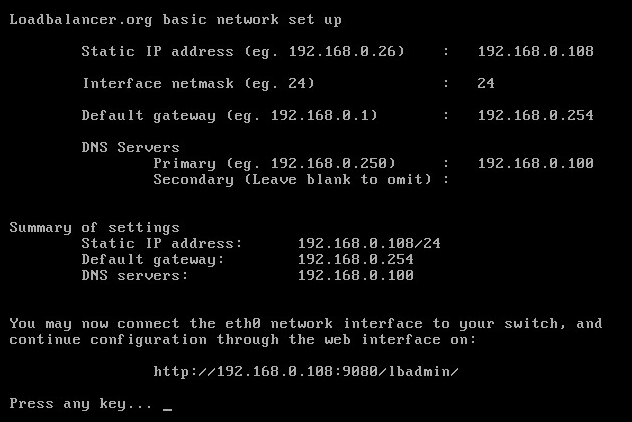
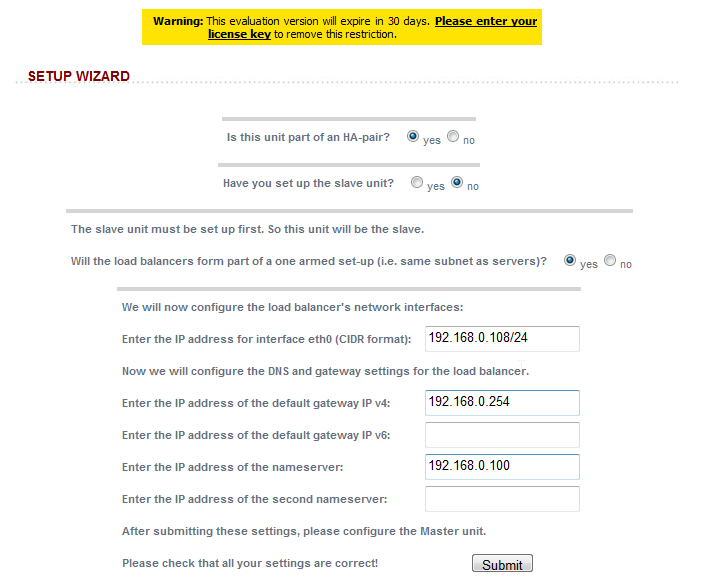
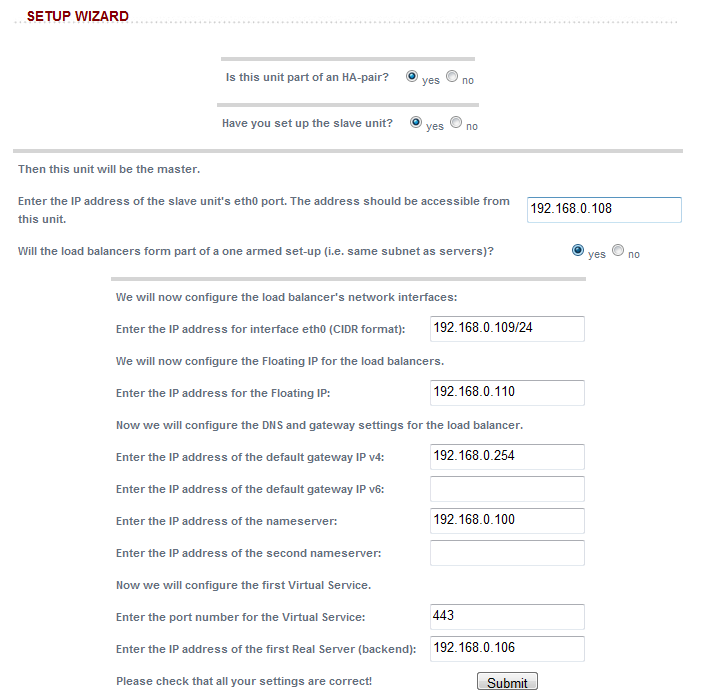
Once you have downloaded the Virtual Appliance in OVF format, deploy it twice into VMware under the names NLB01 & NLB02. You can then connect to the console and complete the initial network configuration by following the on screen instructions and using the IP addressing above.
Once the appliances are on the network, connect to https://192.168.0.108:9443 and https://192.168.0.109:9443 using the below details.
Initial Username: loadbalancer
Initial Password: loadbalancer
You will then need to run the wizard, first on the slave, then on the master. Here is the configuration in my lab:
Further info can be obtained from the loadbalancer.org manual available here.
You should now also change the loadbalancer password.
This completes the first post in the series as we are now ready to start deploying key elements of the application topology.
References & Further Reading
VMware vSphere manuals
Windows Server 2012 R2 Evaluation Resources
loadbalancer.org manual
Next time…
In the next post, I will move on to deploying services Lync requires, starting with an Office Web Apps Server farm, then SQL.
Pingback: Build a Lync 2013 Lab: Part 2 - Office Web Apps 2013 Farm (WAC) « JERVIS DOT WS JERVIS DOT WS