During your deployment of Lync you will need to provision the file store, and my Lync 2013 Lab series covers deploying the whole environment in a full High Availability configuration. We will apply the same logic to the Lync File Store and use Distributed File System (DFS) to help us achieve it.
This will be a whistle stop tour of creating all you need within DFS to support the Lync file store, you may wish to follow my further reading links for more detail on DFS. Also Jeff Schertz’s Blog article ‘Breaking Down the Lync File Share’ comes highly recommended, his blog contains loads of amazing Lync content.
To use a DFS, Lync Server 2013 requires the following:
- Namespaces are domain based
- All namespace servers are running a minimum of Windows 2008
Contents
First of all, we will need to provision a minimum of two shares that will be kept in sync and will act as ‘DFS targets’. In a standard edition deployment, its possible to co-locate the file store on the standard edition front end server. In an enterprise pool you can’t locate the file store on your front end servers, you should instead locate an appropriate alternative within your environment to place the file store. Considerations should include: Network segment choice, Security, Availability, Access times / latency.
Within the lab we will use the SQL servers. Login to both SQL servers, LYNCSQL01 and LYNCSQL02 then create and share “c:\LyncFileStore”.
“Lync Server 2013 setup requires that permissions on shared folder allow full access to Administrator. Lync Server 2013 will then use NTFS file permissions to ACL the folders. Inherited DFS share permissions will not be used to restrict access.” Source TechNet
Apply the following NTFS permissions:
Administrators Group – Full Control
Share the folder and then apply the following share permissions:
Everyone – Full Control
Permissions are then controlled via NTFS permissions, it maybe possible to reduce the share permissions here, but I have not tested that configuration fully.
Install DFS
Install the DFS Replication feature on each server that will host a target folder, in the case of our lab, this will be LYNCSQL01 and LYNCSQL02.
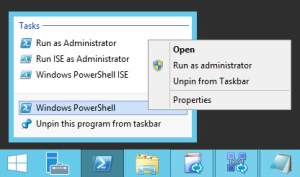
Open PowerShell as an administrator:
Run the following command to install DFS Replication:
Add-WindowsFeature FS-DFS-Replication
Install the DFS Namespace role on each server that will host the Namespace, in the case of our lab, this will be DC01. Open PowerShell as an administrator and run:
Add-WindowsFeature FS-DFS-Namespace
Install the DFS Management Tools on each system that will manage DFS, in the case of our lab we will keep it simple and use DC01. Open PowerShell as an administrator and run:
Add-WindowsFeature RSAT-DFS-Mgmt-Con
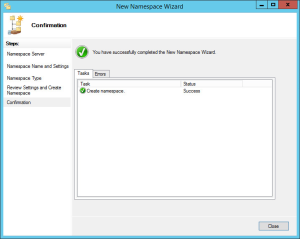
Create DFS Namespace
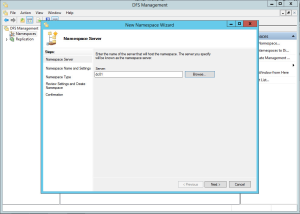
Before we can publish a folder through DFS, there has to be a Namespace. This will contain a collection of folders that are visible to users, it’s in affect the top level container.
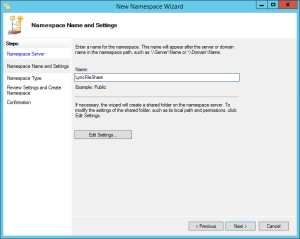
Provide a name, this will be its published name.
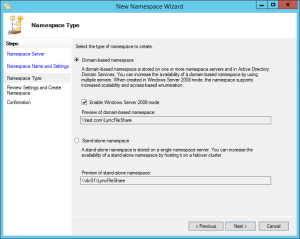
Select a Namespace type, either domain or standalone. This choice mainly comes down to vendor/application support, organisational policy or security considerations, although in reality cost and personal preference also play a part.
Domain based (as we will use in the lab) provides the most simple HA DFS configuration. In order to make a standalone Namespace HA, you would need to configure two servers to host it via a shared cluster resource increasing cost and complexity.
Microsoft does state that when using DFS, Lync Server 2013 requires that Namespaces are domain based. I have not tested standalone namespaces personally and due to the support statement, recommend you use domain based.
Create New DFS folder and configure DFS replication
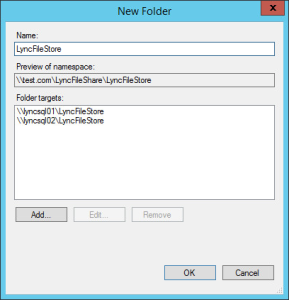
Now create your folder within the Namespace, you will need to define the full path to each members share.
\\lyncsql01\LyncFileStore
\\lyncsql02\LyncFileStore
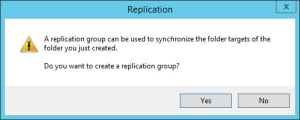
When asked if replication should be configured, choose yes.
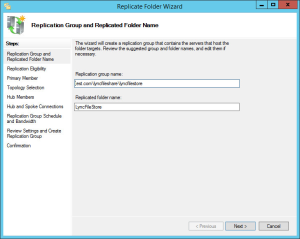
Replicated group name & replicated folder name should already be set.
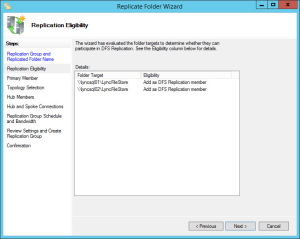
Verify the target paths are correct.
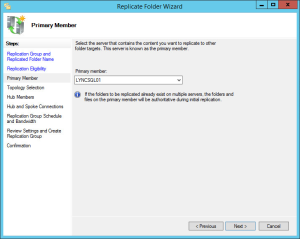
Select one of the members as a primary server.
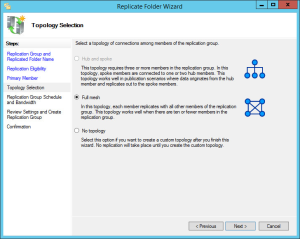
Choose your topology, I would recommend ‘Full mesh’ for this usage. This will ensure all members are kept up to date with each other, in all directions.
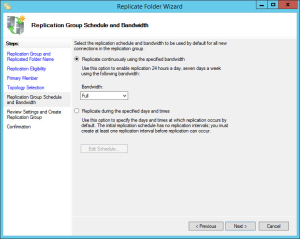
In this case, both of the servers are on a high speed internal data network, and we are configuring this for HA, therefore we don’t want to restrict replication speed too much. Apply an appropriate limit for your environment, or leave it set to Full. In my lab, we will use Full to ensure there is minimal sync delay.
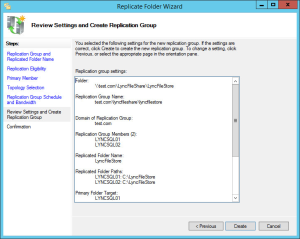
Review your configuration and go back and make any corrections that are required.
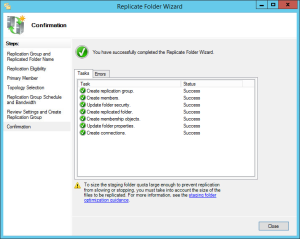
Ensure deployment is successful, if there are any errors ensure they are checked and the wizard is run again successfully.
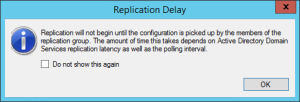
Note the replication delay notice, this is normal.
Review Configuration
Navigate through the DFS Management Console and verify your new Namespace, folder and replication group are correctly setup. Take this opportunity to familiarise yourself with the DFS Management Console.
References & Further Reading
Jeff Schertz’s Blog: Breaking Down the Lync File Share
TechNet: DFS Namespaces and DFS Replication Overview
TechNet Blogs: DFS Replication in Windows Server 2012 R2: If You Only Knew the Power of the Dark Shell
TechNet Blogs: DFS Replication in Windows Server 2012 R2: Revenge of the Sync
Next time…
In the next post, I will move on to Active Directory preparation, Front End Prerequisites and Deploying the initial topology.
