 The next stage of the process is to complete the Lync AD prep, install the prerequisites on the first front end server, deploy management tools and design the initial topology.
Contents
Install Prerequisites
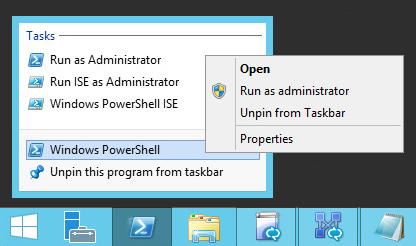
First login to the first server in your new Lync 2013 Front End pool. We will use this as the initial point of administration, feel free to appoint a separate management machine if you wish however you can deploy the relevant management tools there later.
Mount the Server 2012 R2 media and update the source parameter in the following command (e.g. D:\sources\sxs) with the correct location for your environment.
Install the required prerequisites including the server administration tools followed immediately by a server reboot. As per Jeff’s recommendations, I too would install Telnet Client at the same time.
From a PowerShell prompt, running as administrator, enter:
Install-WindowsFeature RSAT-ADDS, Web-Server, Web-Static-Content, Web-Default-Doc, Web-Http-Errors, Web-Asp-Net, Web-Net-Ext, Web-ISAPI-Ext, Web-ISAPI-Filter, Web-Http-Logging, Web-Log-Libraries, Web-Request-Monitor, Web-Http-Tracing, Web-Basic-Auth, Web-Windows-Auth, Web-Client-Auth, Web-Filtering, Web-Stat-Compression, Web-Dyn-Compression, NET-WCF-HTTP-Activation45, Web-Asp-Net45, Web-Mgmt-Tools, Web-Scripting-Tools, Web-Mgmt-Compat, Windows-Identity-Foundation, Desktop-Experience, Telnet-Client, BITS -Source D:\sources\sxs -Restart
Active Directory Preparation
The next stage of the process is to prepare Active Directory for the Lync 2013 installation. This post covers a green field deployment and is easily adjusted for a Lync 2010 to 2013 upgrade. Upgrades from OCS 2007 R2 are supported by Lync 2013, but earlier versions directly are not. If your running an earlier version of OCS/LCS, please check the details on TechNet.
BACKUP, BACKUP, BACKUP. Remember to take the correct precautions on your environment before applying schema updates. If a schema update fails, you could be looking at a restore. You have been warned. If you don’t know what your doing, call someone in now.
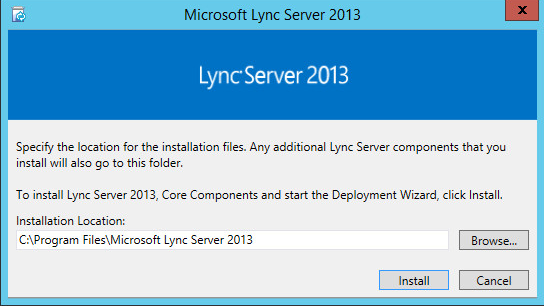
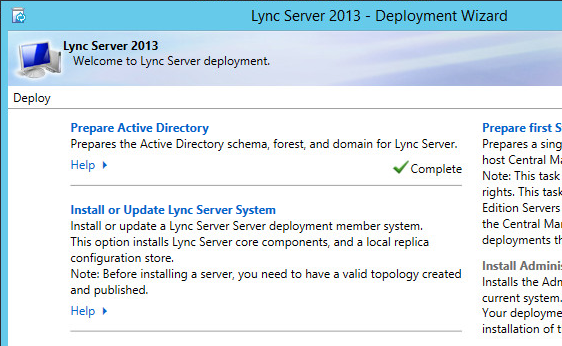
Mount the media and install the deployment wizard.
Once the deployment wizard is running, you will need to select ‘Prepare Active Directory’.

Now follow each step in turn, completing the action and then completing the verification. I have outlined the main steps here but please refer to the ‘in wizard’ instructions for prerequisites and verification steps, they contain all you need.
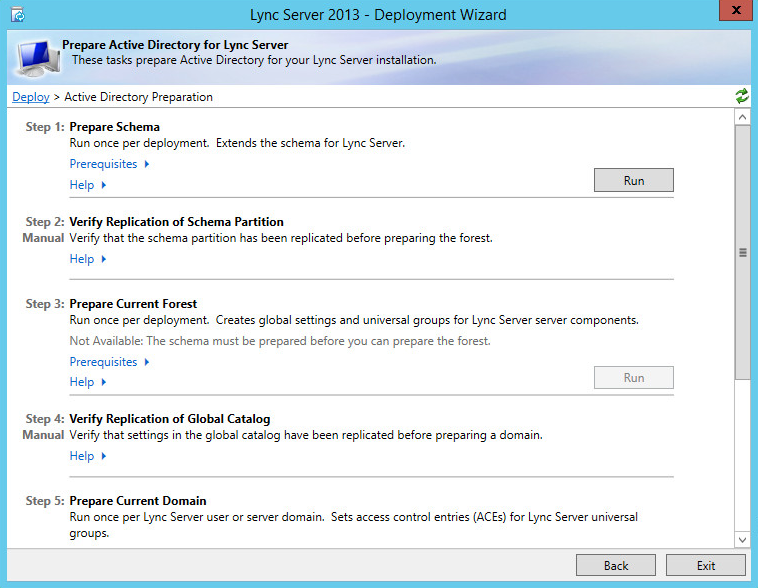
Next choose ‘Prepare Schema’, full details of the prerequisites for this step are included within the deployment wizard, therefore I will not repeat them here.

Once complete, follow the guidance provided to verify replication of the schema partition.
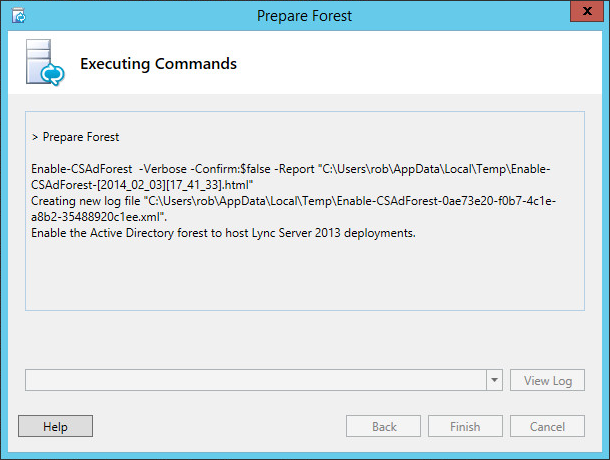
Next choose ‘Prepare Current Forest’, full details of the prerequisites for this step are included within the deployment wizard, therefore I will not repeat them here.
In environments where Lync is being installed into a child domain within a forest, you may need to complete this stage on a forest root domain controller. For example, if you are installing Lync into the testdomain.testforest.local domain, and you have completed these stages on lyncfe01.testdomain.testforest.local, then the perpare forest stage should be run from a member server within the testforest.local domain.
Remember that to prepare the forest schema you will need to use an Enterprise Admin account.
As always, review the logs and ensure all has completed successfully. Then verify replication of global catalog, instructions are provided within the wizard.

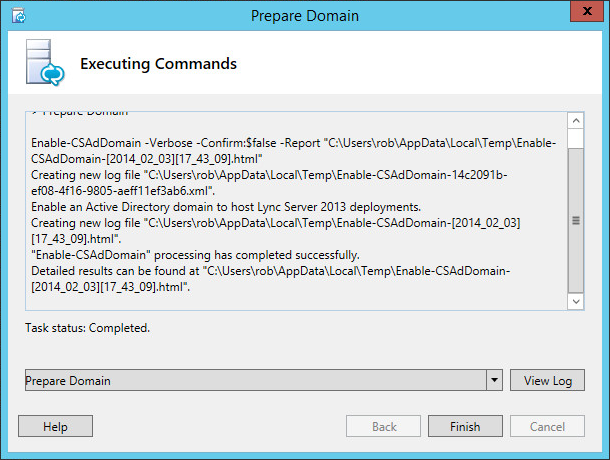
Lastly, we need to ‘Prepare Current Domain’ which will allow it to support Lync 2013 deployments.

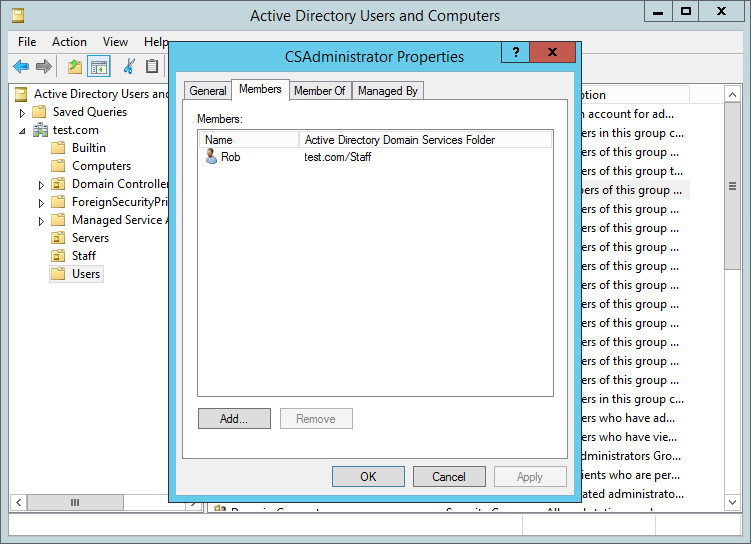
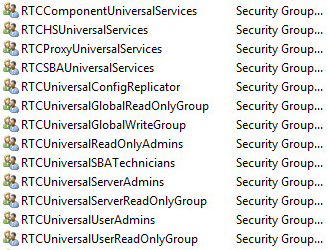
Now all that scary schema work is out of the way, we need to add the Lync administrators into the relevant groups. There will be a range of groups that have been created, all OCS/Lync groups either start RTC or CS. At this stage, just add your main Lync administrators (their privileged accounts rather than their standard accounts) to the CSAdministrator group. Help desk staff can be configured later by adding them into the relevant groups.

Once we have completed the Lync Active Directory Preperation, your ready to move forward.
Management Tools
From the front screen of the deployment wizard, click the ‘Install Administrative Tools’ link. You can install these tools where you feel they are required. I personally like to install them on the first FE server within the pool, eg: lyncfe01.test.com and also a management terminal.
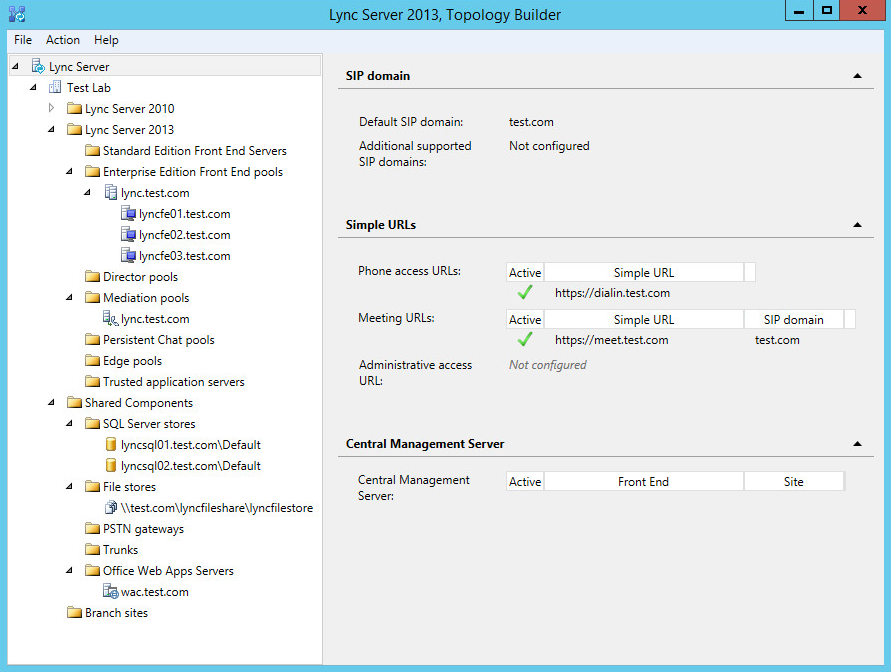
Topology
The key to moving your deployment forward now, is to define the inital topology. Here we will define the relationships with the file store, WAC servers and database servers we build in the earlier posts.
Define the SIP domain name

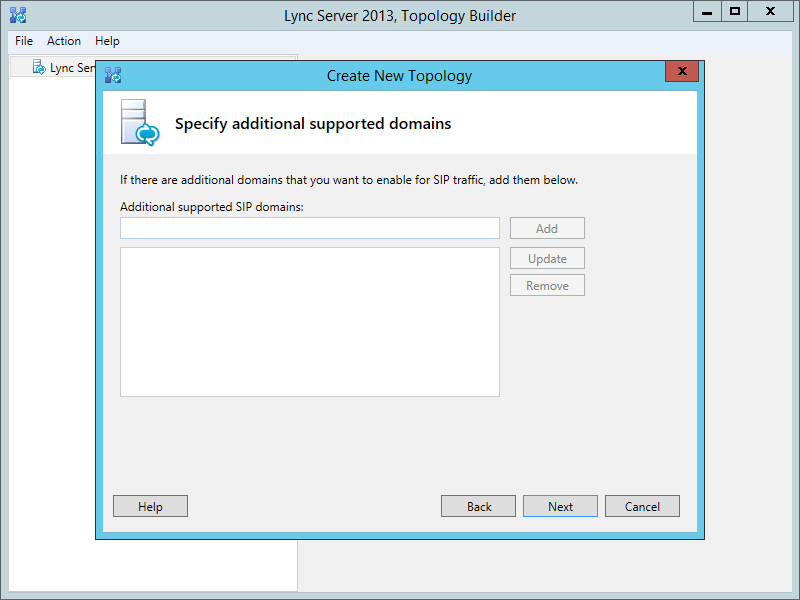
Specify any additional SIP domain names you require
Define the name of your site
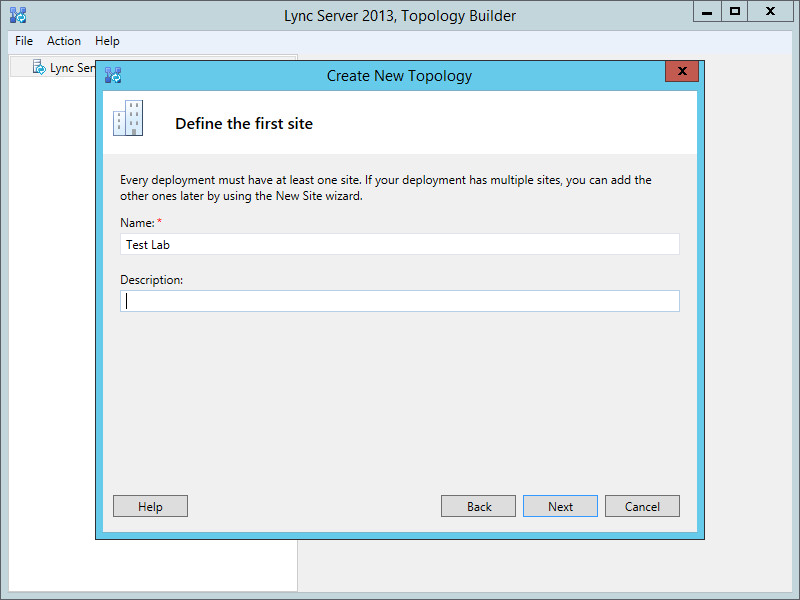
Fill in the relevant location information

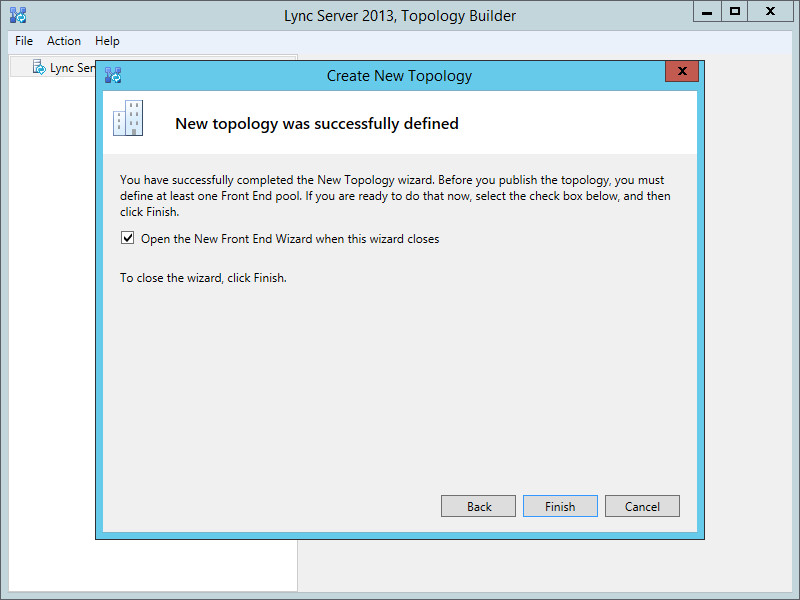
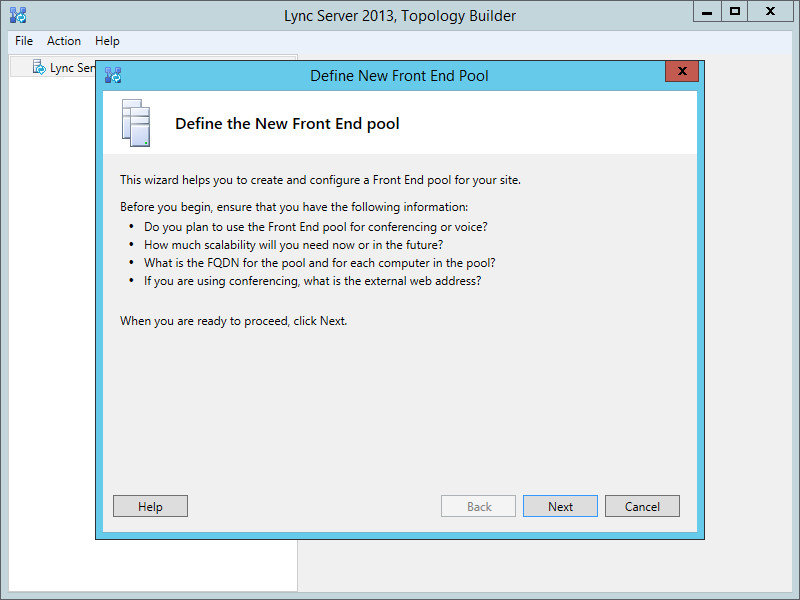
Ensure you start the ‘New Front End Wizard’ next…
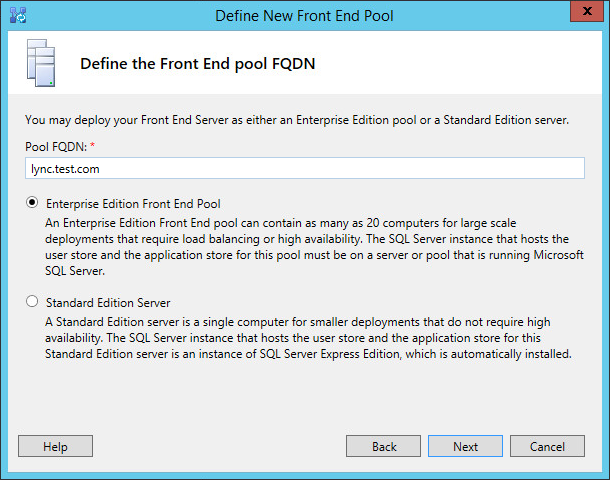
Define the pool FQDN
Define the pool member names, in our lab you should include all three.

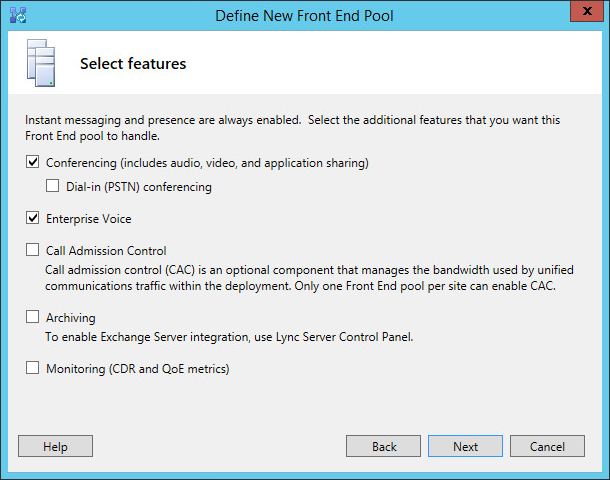
Select the features you wish to enable. Others can be enabled later, if you are deploying this pool into an environment with Lync 2010 currently running, this example is a good starting point. Within the lab, you could also enable Call Admission Control (CAC) and Conferencing, Archiving and Monitoring now if you wish, but I will cover adding these in a later post.
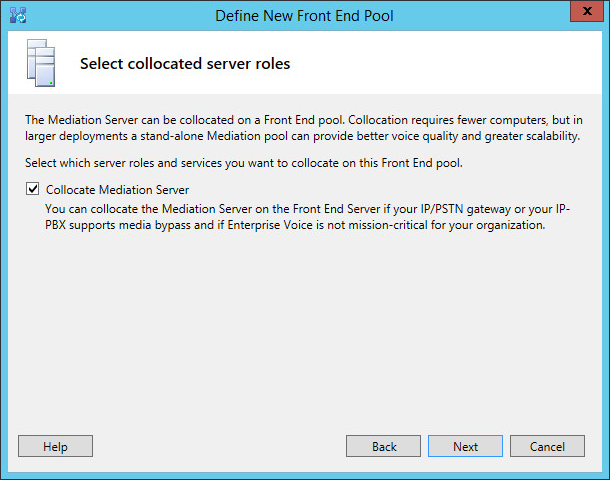
We will collocate the mediation server, this reduces the total number of servers we need to deploy and ensures there are three servers running this role. Decisions here come down to sizing and design.
We will not deploy edge services at this stage.

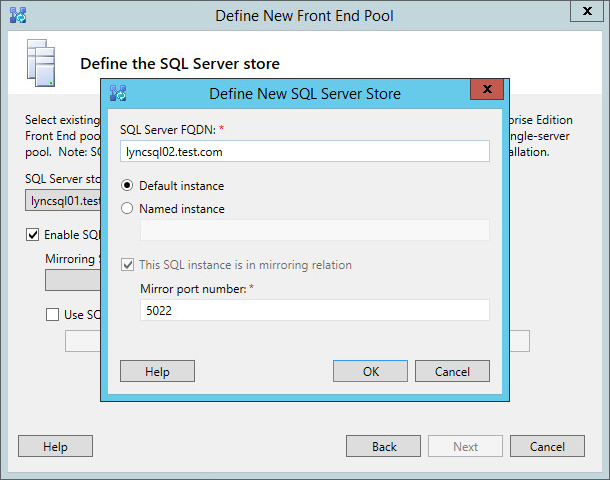
Configure the main backend SQL server
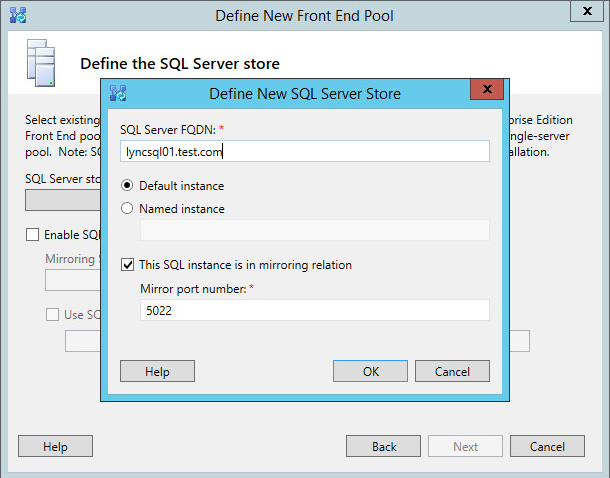
Configure its mirror
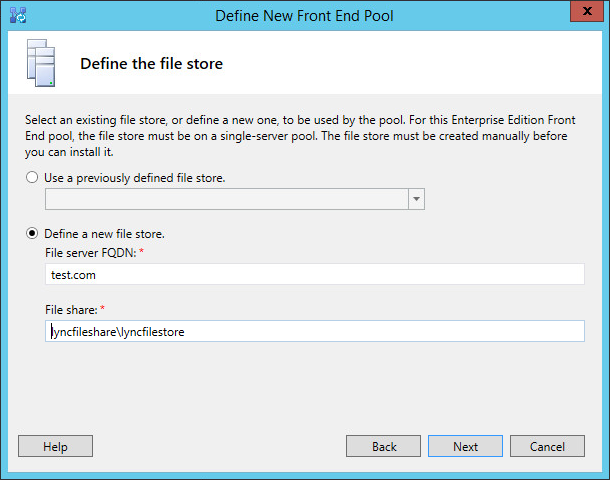
Define the DFS file store location
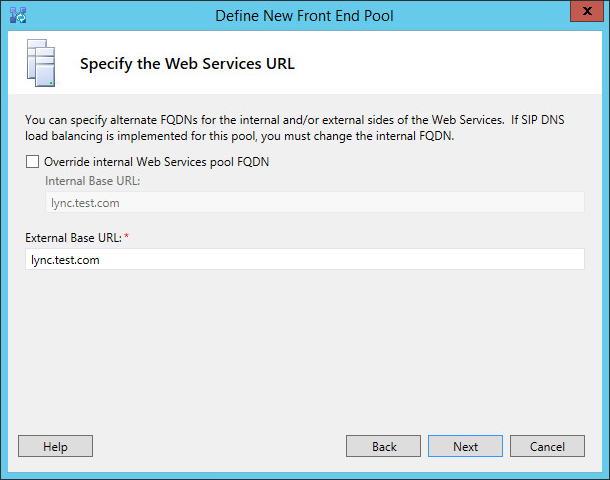
Specify the internal and external URLs for the web services as required.
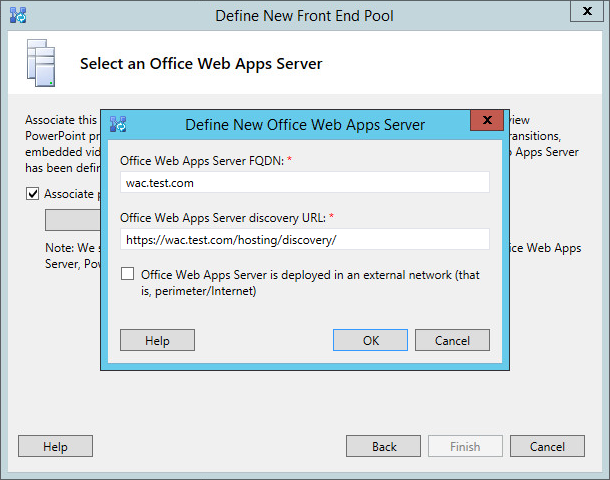
Define the WAC farm we configured earlier.
Review your topology and ensure its correct.
Now right click on your site, and select ‘Topology’, then ‘Publish’.

Review the requirements to ensure you meet them all, then select next to start the publishing of your initial Lync topology. This will setup the servers configuration based on the server names etc supplied within the topology.

Choose which pool will host the Central Management Store (CMS), in a green field site, such as our lab, it will be this pool.

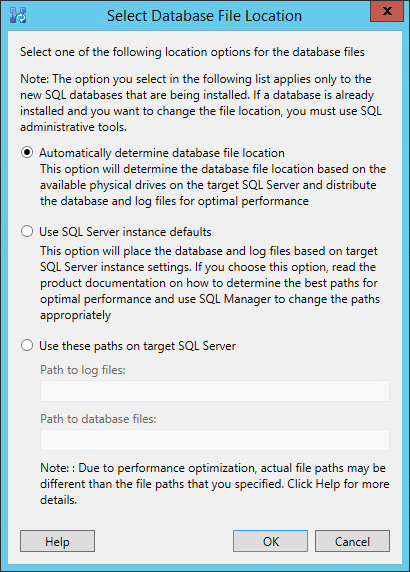
We have no CMS currently and our SQL servers have only just been built, so the location for the files needs to be set to automatic or defined if required.
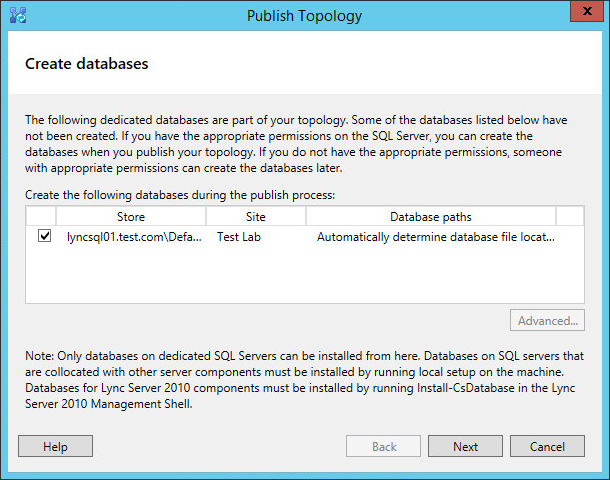
Review how the databases will now be created.
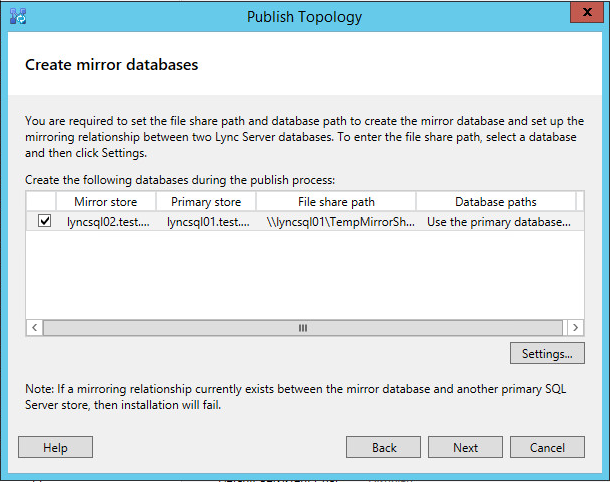
A shared and writeable location needs to be defined, that both servers can access and have Read/Write access too. This will be used in the initial build of the mirror databases. You should ensure share and NTFS permissions are set to allow your account and the SQL service account access.
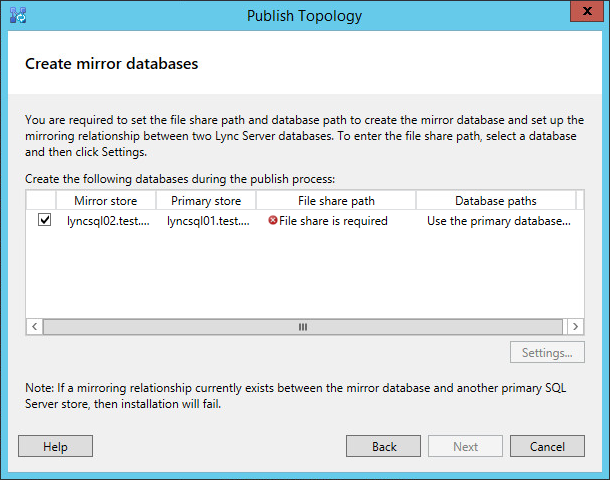
Review the settings for the creation of the SQL mirror databases.
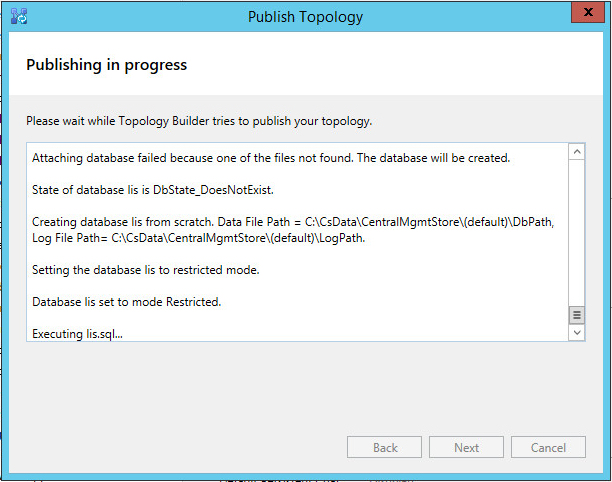
Sit back for a few minutes and watch your new Lync topology being built.
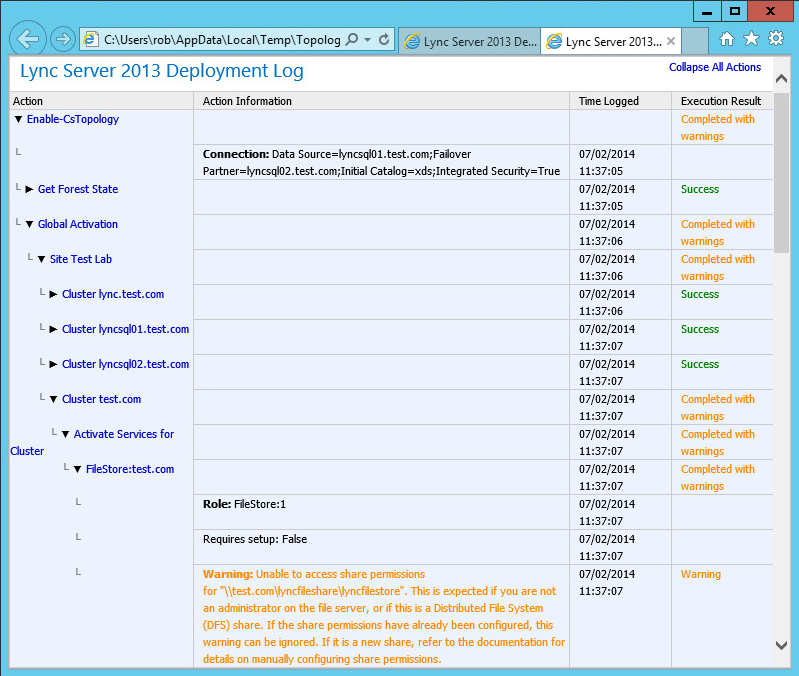
Review the completion summery page for issues. It appears we have 1 area with warning(s), any issues should be worked through and resolved at this stage.

Whenever you get a warning or an error, you should click on the ‘View Logs’ link and look through the output. They are nested and very readable, so expand out to the detail and review the log entries. In this case we have a warning which states “Warning: Unable to access share permissions”, then goes on to say “This is expected if you are not an administrator on the file server, or if this is a Distributed File System (DFS) share.” In our case its a DFS share, so all is well.
References & Further Reading
Jeff Schertz: Lync Server 2013 Deployment – Part 1