speedtest-cli is in the Ubuntu repositories!
sudo apt install speedtest-cli
speedtest-cli
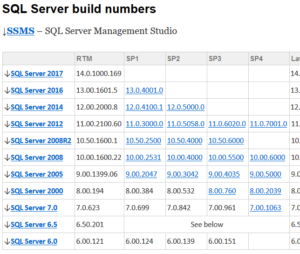
If your looking to confirm what SQL version 11.0.6594.0 is in real terms, then you will be happy to know that it is: CU8 for Microsoft SQL Server 2012 SP3 (KB4013104). But how, well there is a great set of tables over at Build Numbers that shows you!
Click Here: https://buildnumbers.wordpress.com/sqlserver/
Enjoy.
A quick pointer to the ASA software compatability tables. When checking what version you can update a Cisco ASA to, these tables do prove rather useful.
9.9 to 9.5, Current Models
https://www.cisco.com/c/en/us/td/docs/security/asa/compatibility/asamatrx.html#pgfId-268944
Other release compatability is then provided in the other tables.
Legacy Models are shown in Table 6
https://www.cisco.com/c/en/us/td/docs/security/asa/compatibility/asamatrx.html#pgfId-112283
(Correct at time of publishing, 02/01/18)
If you are adding a number of users or computers within Active Directory to one or more groups it can be time consuming. I needed to add AD objects into groups, over time, sometimes with duplicate objects in the source data and the group, so created a txt file per AD group and a small script (one code block per group/file) to help with the additions.
My source text files were raw lists, plain text, one entry per line.
|
1 2 3 |
user1 user2 user3 |
When the script is run, it will add all the entries in the relevent .txt file into the relevent group. This allows you to add to the text file with additional lines, even if there is the odd duplicate, and providing it matches a valid AD object, it will get added!
A nice time saver…..

Script Output

Files….
|
1 2 3 4 5 6 7 8 9 10 11 12 13 14 15 16 17 18 19 20 21 22 23 24 |
Write-Host -------- $grp = "GPO Rollout 0" $users1 = Get-ADGroupMember -Identity $grp $list=Get-Content c:\Users\test\Desktop\gpo0.csv ; $List | foreach {Add-ADGroupMember -Identity $grp -Members (Get-ADComputer $_)} $users2 = Get-ADGroupMember -Identity $grp $added = $users2.count - $users1.count Write-Host -foreground "green" $grp - Had: $users1.count, Now: $users2.count, Added: $added $grp = "Software - Foxit Reader PDF" $users1 = Get-ADGroupMember -Identity $grp $list=Get-Content c:\Users\test\Desktop\fox.csv ; $List | foreach {Add-ADGroupMember -Identity $grp -Members (Get-ADComputer $_)} $users2 = Get-ADGroupMember -Identity $grp $added = $users2.count - $users1.count Write-Host -foreground "green" $grp - Had: $users1.count, Now: $users2.count, Added: $added $grp = "Software - 7-Zip" $users1 = Get-ADGroupMember -Identity $grp $list=Get-Content c:\Users\test\Desktop\zip.csv ; $List | foreach {Add-ADGroupMember -Identity $grp -Members (Get-ADComputer $_)} $users2 = Get-ADGroupMember -Identity $grp $added = $users2.count - $users1.count Write-Host -foreground "green" $grp - Had: $users1.count, Now: $users2.count, Added: $added Write-Host -------- |
Enjoy.
You can use S/MIME certificates, also called “Digital Certificates” or “Personal Certificates”, with most email clients to digitally sign and/or encrypt email messages. In order to digitally sign or encrypt your email, you will need a digital certificate.
For a run down on how to get a certificate, and also how to use it in Outlook 2016, see my earlier post: Digitally signing email with S/MIME and Outlook 2016
In order to use this certificate to sign email from your iPhone, you are going to need to transfer the public/private key pair to your phone, install it, and configure it for use. In this example we will build on the exchange/Office365 model, and continue where I left off on the previous post.
See my earlier post: Digitally signing email with S/MIME and Outlook 2016
There are a number of ways, however in every case I would recommend you secure the key with a strong passphrase and transfer as securely as possible.
In this example we will send it to ourselves in an email, keeping it within the same account, that we have connected to over a TLS session. I do not recommend emailing this in any other way. We will then purge the email from the server as we need to keep this file safe. A direct file copy maybe better, so you could investigate that. For this example, we will send an email message with the certificate file as an attachment to ourselves within the same account. The file will be either a .p12 or .pfx file, that is also passphrase protected.

On your iOS device, open the email message. Tap the attached file to start the installation. On the “Install Profile” screen, tap Install. You may see a warning that the profile is not signed, tap Install and then Install again.
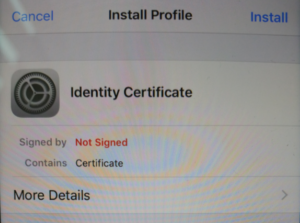
When prompted, enter the passphrase created when exporting the certificate.
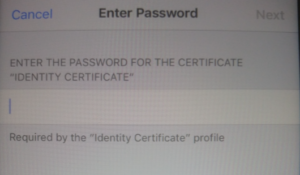
Tap Next, and then Done.
Access your account settings:
iOS 11: Go to Settings > Accounts & Passwords.
Earlier versions: Go to Settings > Mail > Accounts.
Select the email account that the certificate relates to.
Tap the Account button with your IU email address.
On the “Account” screen, tap Advanced Settings, then switch the “S/MIME” setting on. The “Sign” and “Encrypt” options are off by default.
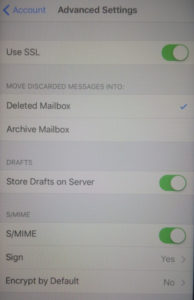
To enable digital signing, tap Sign, and then slide “Sign” to the on position. If you have installed multiple certificates on this device, ensure the check is next to the correct and current certificate. To verify, tap the right arrow to view the certificate details.
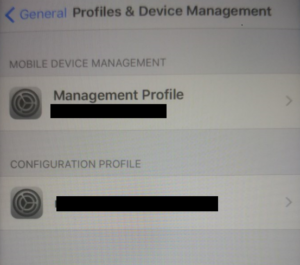
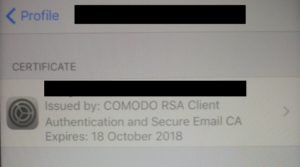
The encryption option will attempt to encrypt all email from your device, I will cover this in a seperate post and link to it here. For now, we do not want to encrypt all email sent from the account by default, so do not enable encryption.
When you create an email, you should see the padlock in the top right, if so, then it’s likely all will be well.
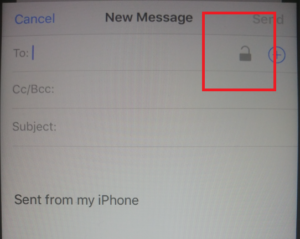
Send a test email and verify the certificate! In Outlook, you will see the red rosette icon by the message as shown below.

Hope this helps!
HTTP Strict Transport Security (HSTS) is a web security policy which helps to protect websites against protocol downgrade attacks by allowing web servers to declare that web browsers should only connect via secure HTTPS connections. The HSTS Policy for the site is communicated by the server to the browser via a HTTPS response header field named “Strict-Transport-Security” which sets the period of time the site should only be accessed via HTTPS.
Whilst this header can not protect the first HTTPS connection to the server, it does ensure all future connections made before the expiry are over HTTPS. Each valid response also resets the time period.
If your looking to enable HSTS on Apache this should help:
First setup your site, eg:
/etc/apache2/sites-enabled/default-ssl.conf
ServerAdmin webmaster@example.com
ServerName www.example.com
ServerAlias example.com www.example.com
Then configure SSL/TLS and the Strict-Transport-Security header, this wI’ll need to include you’re desired time in seconds:
Header always set Strict-Transport-Security "max-age=31536000; preload"

SSLCertificateFile /etc/ssl/certs/example.crt
SSLCertificateKeyFile /etc/ssl/private/example.key
SSLCACertificateFile /etc/ssl/certs/example-ca.crt
Lastly we will need to enable the headers module, and restart apache.
root@server:~# a2enmod headers
Enabling module headers.
To activate the new configuration, you need to run:
  service apache2 restart
root@server:~# service apache2 restart
 * Restarting web server apache2                                                                                                         OK
root@server:/etc/ssl/certs#
You will likely need to adjust the above for your needs, however on a clean server this would get you up and running.
Hope this helps!
You can use S/MIME certificates, also called “Digital Certificates” or “Personal Certificates”, with most email clients to digitally sign and/or encrypt email messages. In order to digitally sign or encrypt your email, you will need a digital certificate.
For this example, we will use the free certificate service from Comodo.
Head over to: https://www.comodo.com/home/email-security/free-email-certificate.php
Another Option: https://www.entrustdatacard.com/products/digital-signing-certificates/secure-email-certificates
Once you sign up, you will receive an email with a link to download the digital certificate.
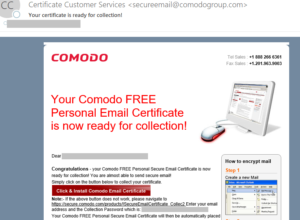
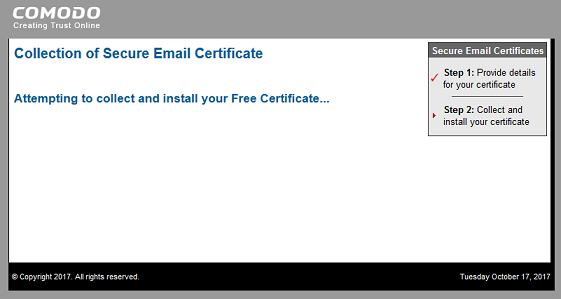
Click the link to obtain the certificate. You will then need to import it. My system automatically imported it, but as I was running Firefox it went into the Firefox certificate store, rather than the Windows Certificate Store as used by Internet Explorer.
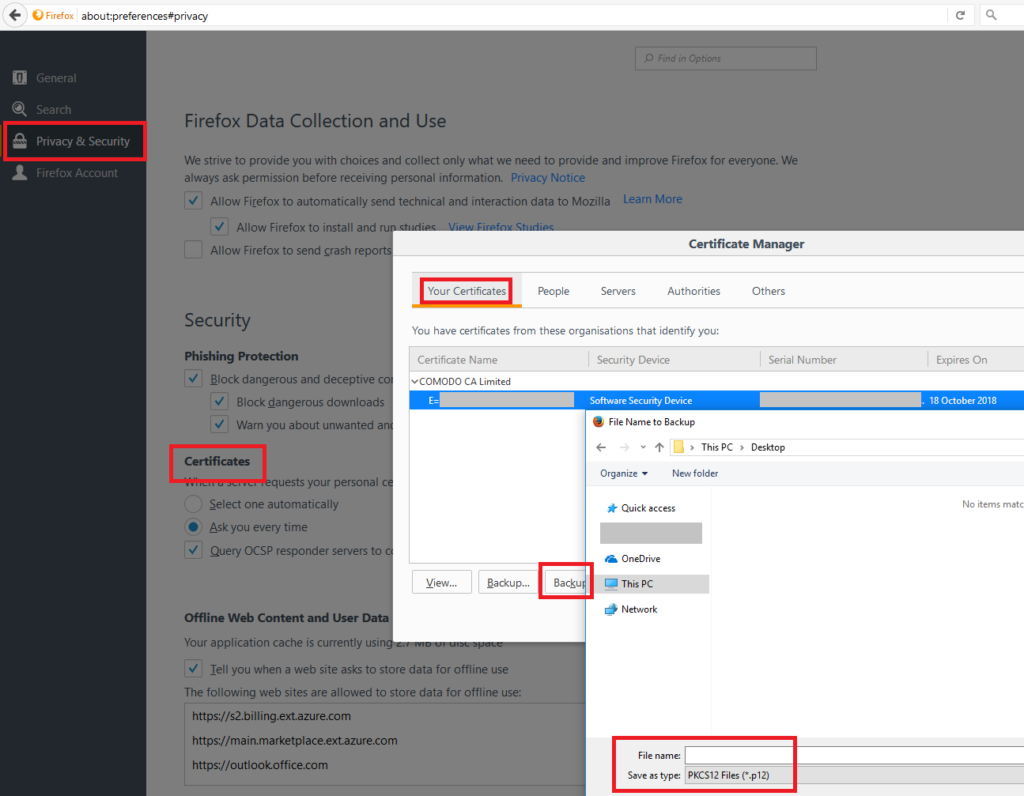
We need the certificate in the Windows Certificate Store so Outlook 2016 can use it. I accessed the Firefox preferences to locate the certificate. Preferences > Privacy & Security > Certificates > Your Certificate > (Select Certificate) > Backup. Choose a safe location and backup the certificate. You can also delete it from the Firefox Certificate Store.
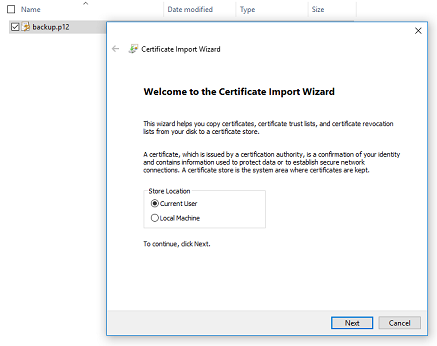
On the computer to which you’re importing the certificate:
Also backup your certificate file (the one you just imported) to a safe and secure place.
OPTIONAL: Open the Certificates MMC if you would like to double check its there. (Start > Run > type: mmc > File > Add Snap-in > Certificates).

Next we need to configure Outlook 2016 S/MIME.
In Outlook, click New Email to compose a new message. Click the Options tab, and you will see:
Sign: This option digitally signs the message so others can be sure it came from you.
Encrypt: This option encrypts the message content and attachments.
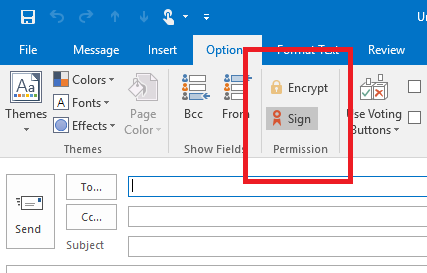
You will see the icon next to signed messages.

Email clients not using S/MIME certificates will not be able to view encrypted email. Clients that cannot use S/MIME certificates include OWA accessed using Chrome, Firefox, and Safari. Email recipients who use one of these clients will be unable to view an encrypted email. However, all mail clients can view digitally signed email.
Digitally signing email with S/MIME and the iPhone / iOS
So it is big in the news this week, ROCA, what’s the deal?
I’m not going to cover this in detail yet, however here is what you need to know now:
The ROCA vulnerability (tracked as CVE-2017-15361) enables computation of RSA private keys from their public certificate/key counterparts. The flaw affects the implementation of RSA key pair generation by Infineon’s Trusted Platform Module (TPM). It is possible for a range of key lengths, including commonly used 2048 bit and older 1024 bit certificates. Chips as early as 2012 are affected and these are common place in TPM v1.1 modules.
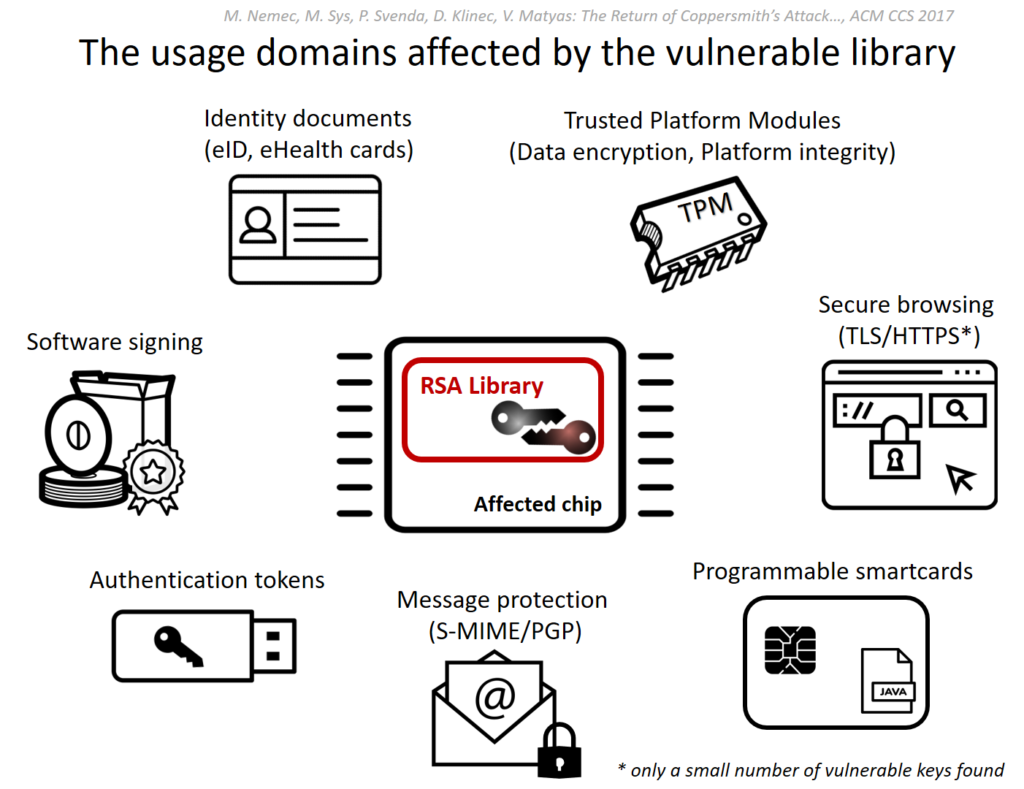
Source: https://crocs.fi.muni.cz/public/papers/rsa_ccs17
A successful computation of a private key allows, depending on its use, the attacker to decrypt sensitive data (eg: file encryption, disk encryption, HTTPS), forging digital signatures (used for email security, and file signing), or even impersonation and identity theft from (access control cards to e-ID cards).
Major vendors including Microsoft, Google, HP, Lenovo, Fujitsu already released the software updates and guidelines for a mitigation.
The ‘The Return of Coppersmith’s Attack: Practical Factorization of Widely Used RSA Moduli’ (ROCA) research paper will be released at ACM CCS in 2 weeks time.
Recommended Reading & Tools (Online and Offline)
In order to further harden a folder, for example an ‘uploads’ folder as used by WordPress, it maybe appropriate to block the execution of key file types. If you have a specific folder where content can be more easily written, blocking execution of script files will help reduce the chance of an attacker executing a script, even if they are able to upload it.

A lot of attacks automaticity identify vulnerable sites, and then attempt to exploit them. These attack scripts then essentially report a list of exploited sites, which are then used in a second stage, such as relaying spam email.
By creating a .htaccess file within this specific folder on your Apache web server, you can more tightly control what content is served.
|
1 2 3 4 |
<Files *.php> Order Deny,Allow Deny from all </Files> |

Hope this helps.